Since first released on January 9, 2007, iPhone become more and more popular for its mutiple functions: as a portable media player (equivalent to an iPod), a camera phone (including text messaging and visual voicemail), and an Internet client (with email, web browsing and local Wi-Fi connectivity).
Here, I’ll tell you how to enjoy your iphone fully, such as, how to create your favorite iPhone Ringtone, how to enjoy DVD, videos on your iphone, and how to backup things from your iphone to pc.
The guide includes four parts.
Part One: How to create free iPhone Ringtones by yourself?
Part Two: How to enjoy DVD movies on your iPhone?
Part Three: How to enjoy videos on your iPhone?
Part Four: How to transfer music from one iPhone to another iPhone, iPhone to PC, PC to iPhone?
Part One: How to create free iPhone Ringtones by yourself?
We know that iPhone, iPhone 3G Ringtones use the file extension .M4R. And the users must pay $2 for a piece of song through Apple iTunes store. While now, you can create free iPhone Ringtones by yourself with Aiseesoft
iPhone Ringtone Maker.
You can take the following step-by-step instructions to start.
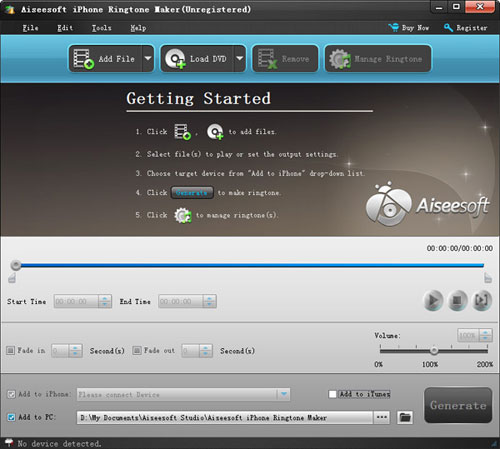
Step 0: Download and install Aiseesoft iPhone Ringtone Maker. After a short while, you can see the following interface:
Step 1: Click “Browse” on the right side of "Input File" to import the file that you want to make ringtone from it.
Step 2: Play it and listen the music to find the segment that you want to use it as ringtone. Then drag and click the start & end slider to set your wanted segment, or type the start & end time in the corresponding text box directly to get the exact segment. You also can pre-listen the converted audio before generate.
Step 3: Click “Browse” on the right side of "Local Output Folder" to choose the output destination.
Step 4: Check "Export to iPhone" option, the converted ringtone will be load to your iPhone directly.
Step 5: After all the settings are finished, click “Generate” to begin making your own iPhone ringtone.
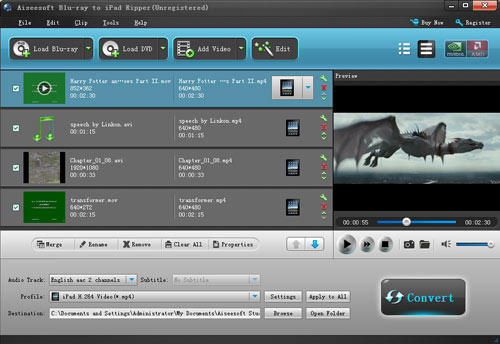
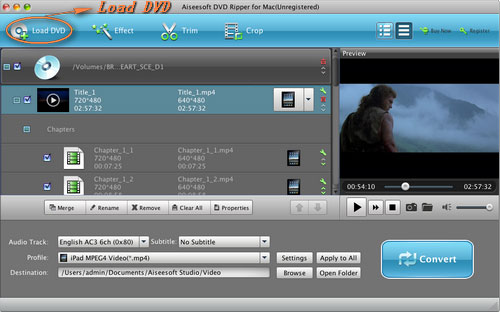
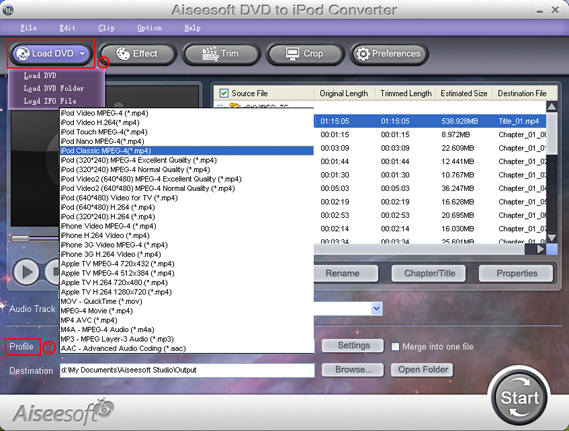
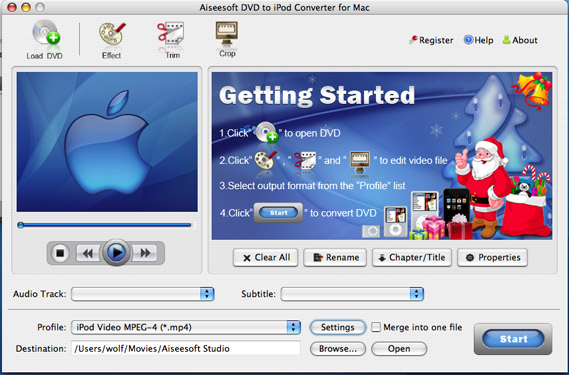
Part Two: How to enjoy DVD movies on your iPhone?
We all know DVD can’t be put on iPhone directly. We need to transfer DVD to iPhone supported format first. Aiseesoft
DVD to iPhone Converter can convert DVD to MP4, MOV, H.264, MP3, M4A, formats for iPhone, iPhone (3G), iPod, iPod Touch, iPod Nano, Apple TV easily and fast.
Step 0: Download and install Aiseesoft DVD to iPhone Converter.
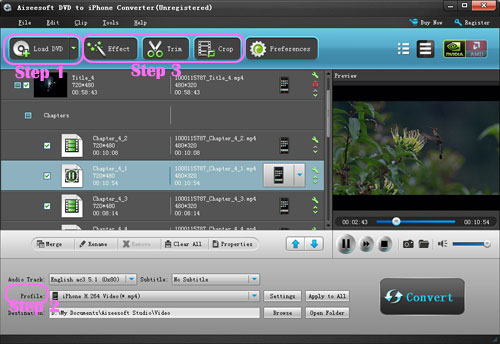
 Step 1
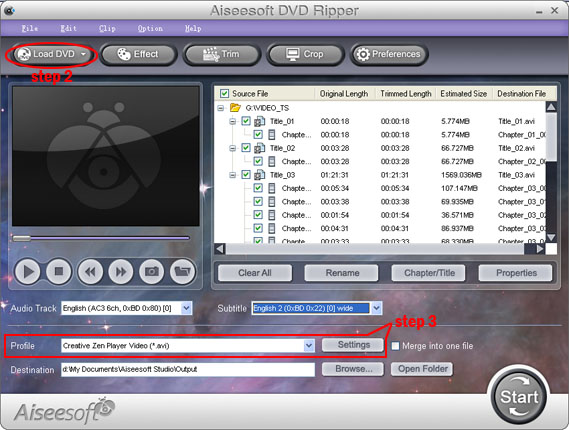
: Import DVD
Place the DVD into your DVD drive and click the “Load DVD” button to load DVD.
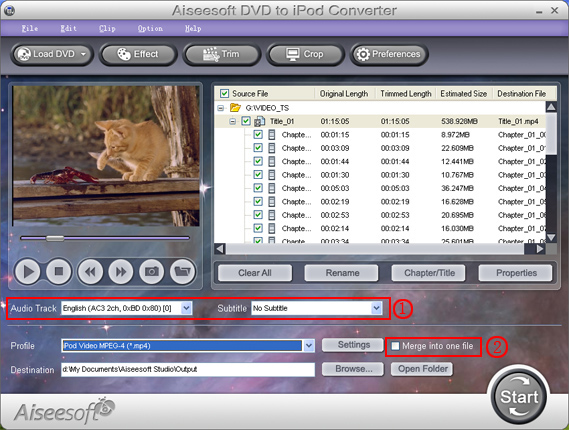
Step 2: Video settings
Select the output video format you need from the “Profile” drop-down list. Click “Settings” button to set your video and audio parameters.
Step 3: Start Conversion
Click “Start” button to start your conversion and it will be finished in a short while.
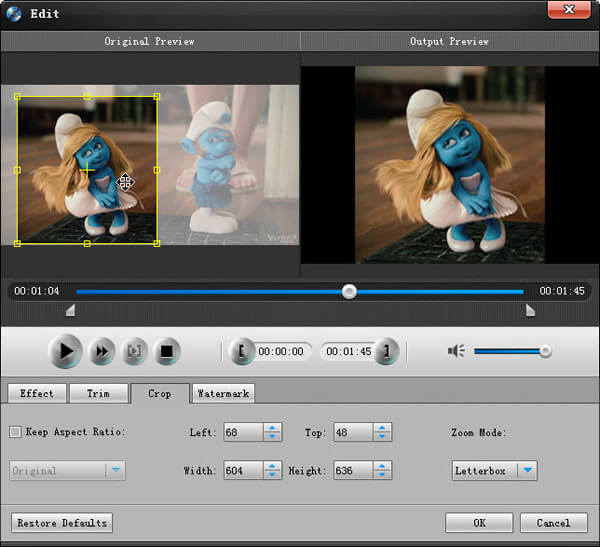
Tips:
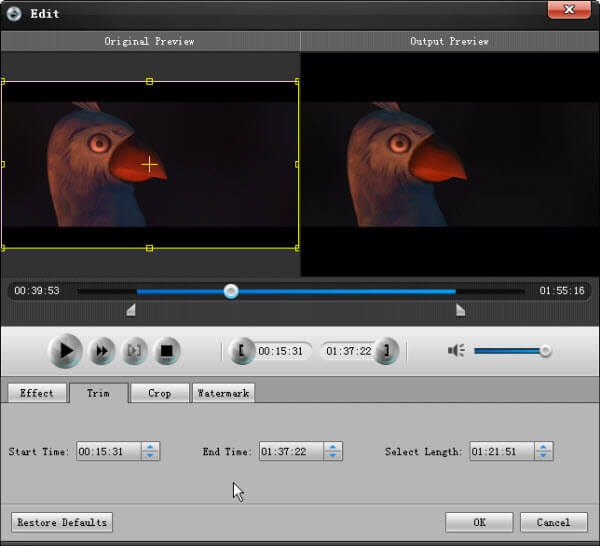
1. "Trim" function is for you to select the clips you want to convert.
2. Click "Effect" to make special effect for your movie.
You can adjust Brightness, Contract, and Saturation of the movie, etc.
3. Cut off the black edges of the original movie video and watch in full screen on your iPod using the "Crop" function.
4. This software allows you to join several DVD chapters into one clips by using "Merge into one file".
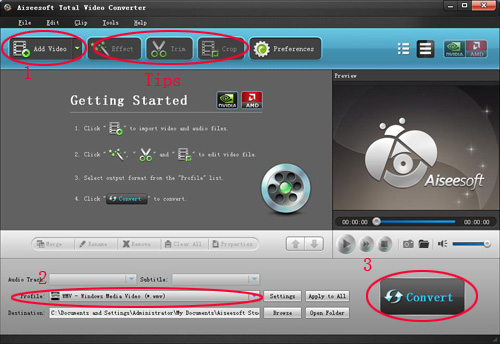
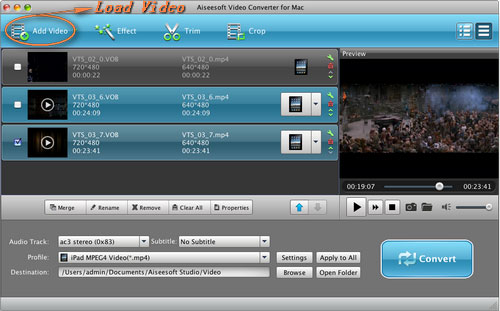
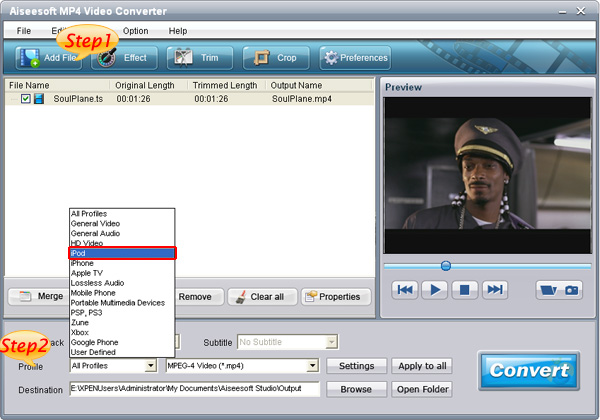
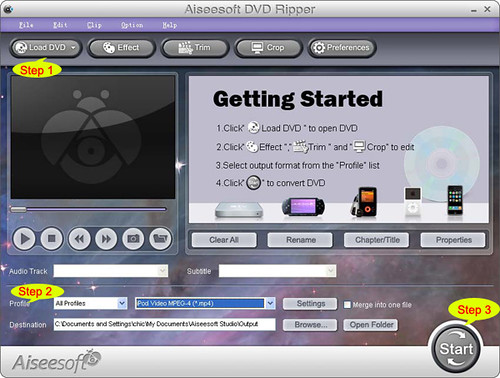
Part Three: How to enjoy videos on your iPhone?
Aiseesoft
iPhone Movie Converter offers a powerful and easy way to convert almost any video files such as MPG, MPEG, MPEG2, VOB, MP4, M4V, RM, RMVB, WMV, ASF, MKV, TS, MPV, AVI, 3GP, 3G2, FLV, MPV, MOD, TOD to iPhone/iPhone 3G/iPod Touch/iPod Classic/iPod Nano MP4 and H.264 video formats with high speed and excellent image/sound quality.
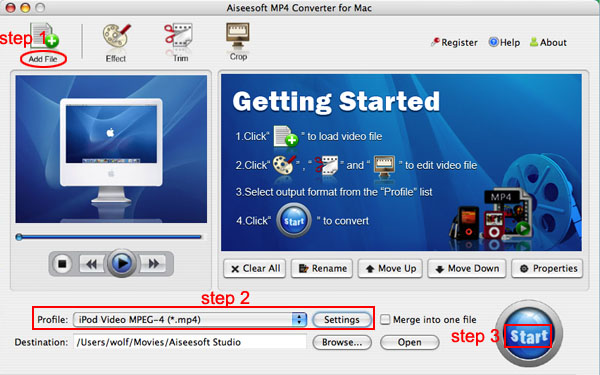
Step 0: Download and install Aiseesoft iPhone Movie Converter.
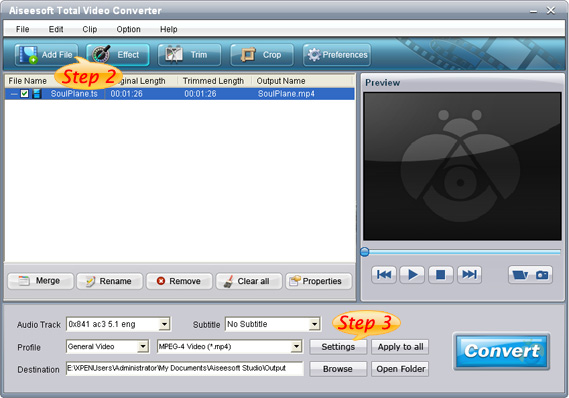
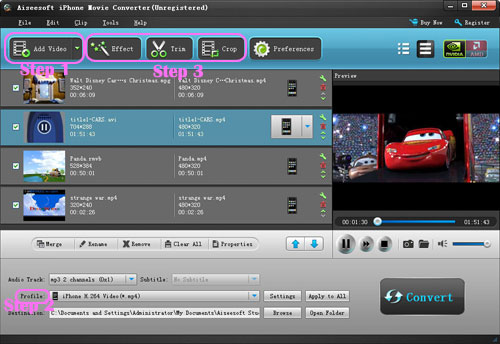
 Step 1
: Click the "Add Files" button and add the video files you want to convert to the program.
Step 2: Set output video format
Click "Profile" button to select the output format for your video. You can click the "Settings" button to to set parameters of your output video such as Frame Rate, Resolution and Video Bitrate, etc.
Step 3: Click the “Start” button.
If you want to your own conversion path, you could click “Browse” button to specify a location on your computer to save the converted movie. If you want to open the output folder, you can just click “Open”.
TipsAiseesoft iPhone Movie Converter also has functions of
Trim,
Crop,
Snapshot and
merge into one file.
Part Four: How to transfer music from one iPhone to another iPhone, iPhone to PC, PC to iPhone?
Apple has make it difficult to copy or transfer the songs, music, audio, videos and files that stored on iPhone to iPhone, or transfer the computer files to iPhone, as well as from iPhone to computer for the protected copyrights on iPhone videos, music. But sometimes we reaaly need them.
Now Aiseesoft Studio provides you a full solution for iPhone (3G) - Aiseesoft
iPhone Transfer, which can meet all your needs.
Download and install Aiseesoft iPhone Transfer.
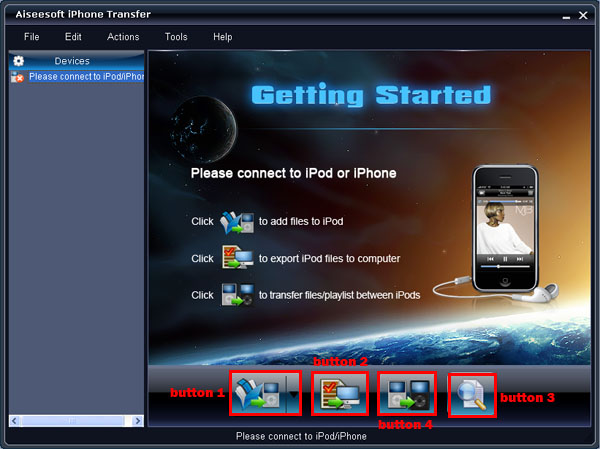 One usage: Copy video and audio files or folders from Computer to iPhoneStep 1
: After Running the software, and connect your iPod/iPhone to your computer via USB cable.
Step 2: Click “Button 1” to seek the files or folders that you want to import to iPod and click OK. The process of importing will be finished instantly.
Two usage: Copy your iPod/iPhone files to your computer.Step 1: After Running the software, and connect your iPod/iPhone to your computer via USB cable.
Step 2: Open the library/playlist that you want to export files, and then check the file(s) you want to export in the file list.
Step 3: Click “Button 2” to select the destination of the exporting files and start exporting files.Otherwise, you could also choose the Export to local option from the Actions menu, and then export the files from your iPod/iPhone to actual device.
Tip: Click “Button 4” to use "Track Filter" function to help you quickly browse your library by genre, artist and album.
Three usage: Transfer files from one iPod/iPhone to another iPod/iPhoneStep 1: After Running the software, and connect your iPod/iPhone to your computer via USB cable.
Step 2: Open the library/playlist that you want to export files. Pick the files that you need to transfer.
Step 3: Click “Button 3”, it will show you the folder of another iPod that you want to transfer to. Click OK. The transfer can be finished automatically.
And if you want to enjoy both DVDs and videos on your iphone, you can have a look Aiseesoft
DVD to iPhone Suite.